Some clever manufacturers have caught the idea of making ruggedized versions of the original Arduino, focused on small scale automation projects.
One of those manufacturers is Controllino, based in Innsbruck, Austria. In their offer, we have three Arduino compatible, DIN-rail mountable controllers. These small controllers have from 8 up to 21 inputs, 6 to 16 outputs, and a range of peripherals from RTC to SPI, I2C, RS-485, and Ethernet.
Today I have on my workbench one Controllino Mini, the smallest in the Controllino range, which I plan to use as a smart controller for a water pump. But before that, let’s take a look at what the Controllino Mini can do…
In the box, we will find only the Controllino. Datasheet, pinouts, and Arduino plugin installer have to be downloaded from the https://controllino.com website. (note: the controllino.cc and controllino.biz domains are not working anymore).
Right out of the box you can feel the Controllino Mini is not a toy. It has a sturdy look, a nice finishing, well-marked connectors.
On the top of the Controllino Mini we find a set of 20 LEDs, the reset button, USB connector used for programming, a button that enables or disables the RTC, and a 26-pin connector that can be used to directly interface to microcontroller pins. All signal pins on this connector are protected with serial resistance. Pins that provide 5V and 3.3V are also present, with a total current limit of 200mA (150mA for the 3.3V pin) .
As inputs, we find a number of six analog/digital input connectors plus two digital connectors which can be configured as external interrupt sources. The datasheet says all those pins have an automatic divider, with the division ratio of 3.06 for 12V supply and 6.14 for 24V supply.
I can’t resist but open the Controllino Mini to take a closer look at the input and output circuits. I’m not going to perform a full teardown as this particular Controllino has to go into a permanent location, but the below pictures provide a good view of the insights of this device.
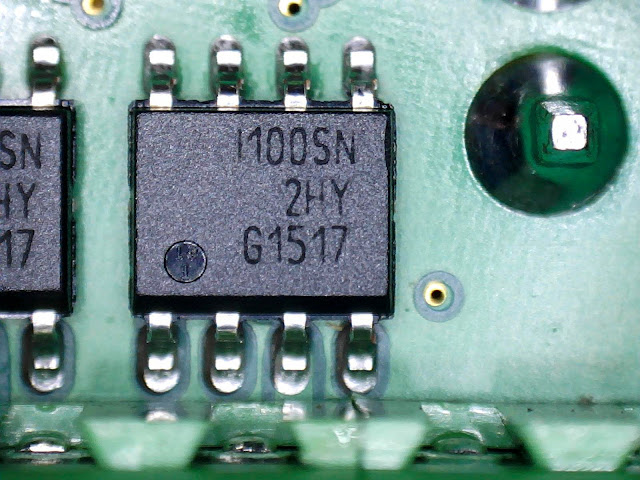
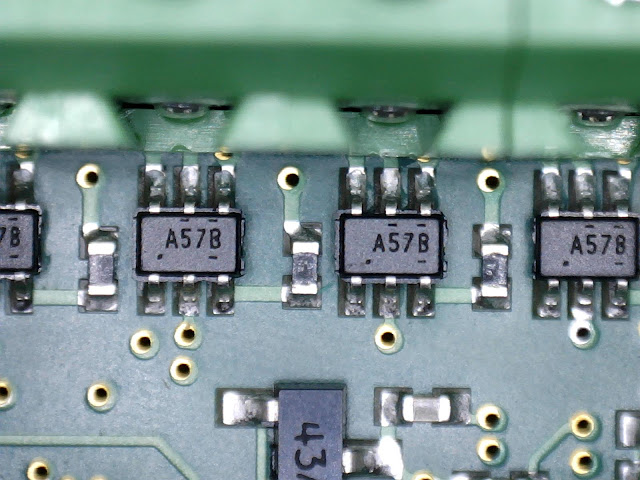
We see here on the bottom board the relays and a big, non-resettable fuse. On the board in the middle we find the input and output circuits, the ATMEGA-328P microcontroller, and the power supply. Let’s take a closer look under a higher magnification:
On the input side, we notice a bunch of FSA4157 high-performance Single Pole/Double Throw (SPDT) analog switches used as automatic voltage dividers, based on the power supply voltage. On the output side, we find some ITS4100S-SJ-N smart High-Side NMOS-Power switches, which according to the datasheet can be used to drive all types of resistive, inductive and capacitive loads. They also provide output current limiting to a max value of 2A.
There are only two things that make me say meh. One is that PWM pins also drive the relays. The datasheet says the relays will be ON in PWM mode when the duty factor is over 30%, so one should take care of this aspect in software. The second thing that I don’t particularly like is that the INT pin of the RV-2123-C2 RTC is connected to the RESET pin of the ATMEGA328P. Again, extra care should be taken in software to prevent unwanted resets of the Controllino Mini.
Besides these two small issues that can be easily ignored, the overall impression is very good. Given the choice, I would choose the Controllino over anything I could build myself when speaking of projects that are designed to be permanent or semi-permanent.
Controllino software
So, we have the hardware, but what about the software? The easy choice is to program the Controllino Mini using the well-known Arduino IDE. Here we have another small issue: the Controllino plugin comes in the form of a Windows executable, which does nothing but extracts the board definitions and Controllino code libraries in the right place.If you’re a Linux person, or simply don’t like the idea of a software installer, there’s the https://github.com/Controllino page where you will find the code libraries and board definitions.
Besides this, it’s just as easy as programming your favorite Arduino boards.
will on June 8, 2016 6:50 pm
How did you get this device?
I prepurchased three of the maxi devices via KickStarter two years ago and the developer stole my money along with all the other people that funded this product.
Electronza on June 8, 2016 6:59 pm
I ordered it from controllino.cc (this was before they become controllino.biz). I had to wait for about one month for it.
I’m sorry to hear about your experience. After purchasing the controllino I found about another manufacturer of Arduino-like industrial products named http://www.industrialshields.com/en/. I haven’t ordered anything from them yet, but their product range looks very nice.
Wasseel on December 31, 2019 6:37 pm
I’m the highest one who supported this project and I’m the last one that was requested by the founder during his second try in KickStarter . I helped him to success but he cheated me only send to me 3 Meaga after long time and I paid for about 9 pieces and I have asked him to be his distributor in middle east.but unfortunately he was fail to fulfill keep his promise.
I guess he will never success because he was stolen my money.
Paul on February 8, 2017 11:14 pm
Hi Guys
I only have myself to blame. I saw this flashy website, with promises of a great product. And when I received the product it did not work. I ordered a mini. When I mailed the manufacturers. I got a hideously insidious response.
I should have done a bit of background checking. Had I spent even 5 minutes on the subject I would have noticed that there are MANY unhappy people out there.
Well…there goes 150 euros down the toilet.
Shame on me for being so bloody naive!
I am now the unhappy owner of a crappy piece of plastic rubbish!
Electronza on February 8, 2017 11:18 pm
Mine still works 🙂 It’s either because I ordered it long time ago (from controllino.cc) and it was one of the first ever made, or maybe I’m just lucky.
You made me curious, why is yours not working? Did it work and stopped, or it was dead from the start?
Paul ferreira on February 17, 2017 3:15 pm
Hi Teodor,
When i un-boxed it, I uploaded the blink program to it. It wouldn’t do the necessary. The LED kind flickered on and off intermittently. As I lifted the item up, it seemed to turn on and off and reset itself.
I also noticed that any form of bump or movement made the thing reset.
I sent an email to Controllino and got THE most insiduous response of something like, “our items are never broken and you can send it back at your own cost and if we find anything wrong with it we will charge you and you can see it as a service to the item.”
Surely the EU must have some sort of consumer protection regarding this kind of transaction? I dont want to send it back, only to be charged for servicing of and item that is barely ten minutes old.
I dont want it at all. Its a piece of crap and I wanted my money back! The email said that under no circumstances would they refund me. Go figure!
As an aside, I truly blame myself for this. If I as much as did a search for this company I would have unearth a plethora of miscreant behaviour.
Electronza on February 17, 2017 3:22 pm
To me it looks like a poor soldering job (or damage during transport). If you paid for it with PayPal you can escalate the case to PayPal. I managed to get my money refunded from PayPal in some similar situations.
Stéphane Clinckart on September 21, 2017 4:09 am
I have 3 Controllino Mega. (2+1 for free… pledged during the kickstarter campaign.
I had to wait too long… but finally got them.
Working well till now (few weeks only).
Trying now RTOS projects on it…
Despite the long wait and the very bad communication skills, the product works very well.
cory on October 26, 2017 3:12 pm
Anybody know if the digital inputs work? I can get analogue input to work but not simple high low digital inputs. I need to use a dht temp humidity sensor eventually..
Electronza on October 26, 2017 3:17 pm
Hi Cory,
The digital inputs work with a locical level depending on the power supply (12v or 24v).
To connect a DHT sensor I suggest to use the connector on top, which is using 5V logic.
TP on March 11, 2019 2:13 pm
Realys are crap. 250EUR just to get something that gets stuck relay every 3months. No, thak you.


0 Comments